As your projects evolve and priorities shift, it is essential to maintain a clutter-free workspace on Orbify. Deleting a project that is no longer relevant or necessary is a simple yet important task to keep your dashboard organized and efficient. In this guide, we’ll walk you through the steps to delete a project on Orbify, ensuring your workspace stays clean and focused on current objectives.
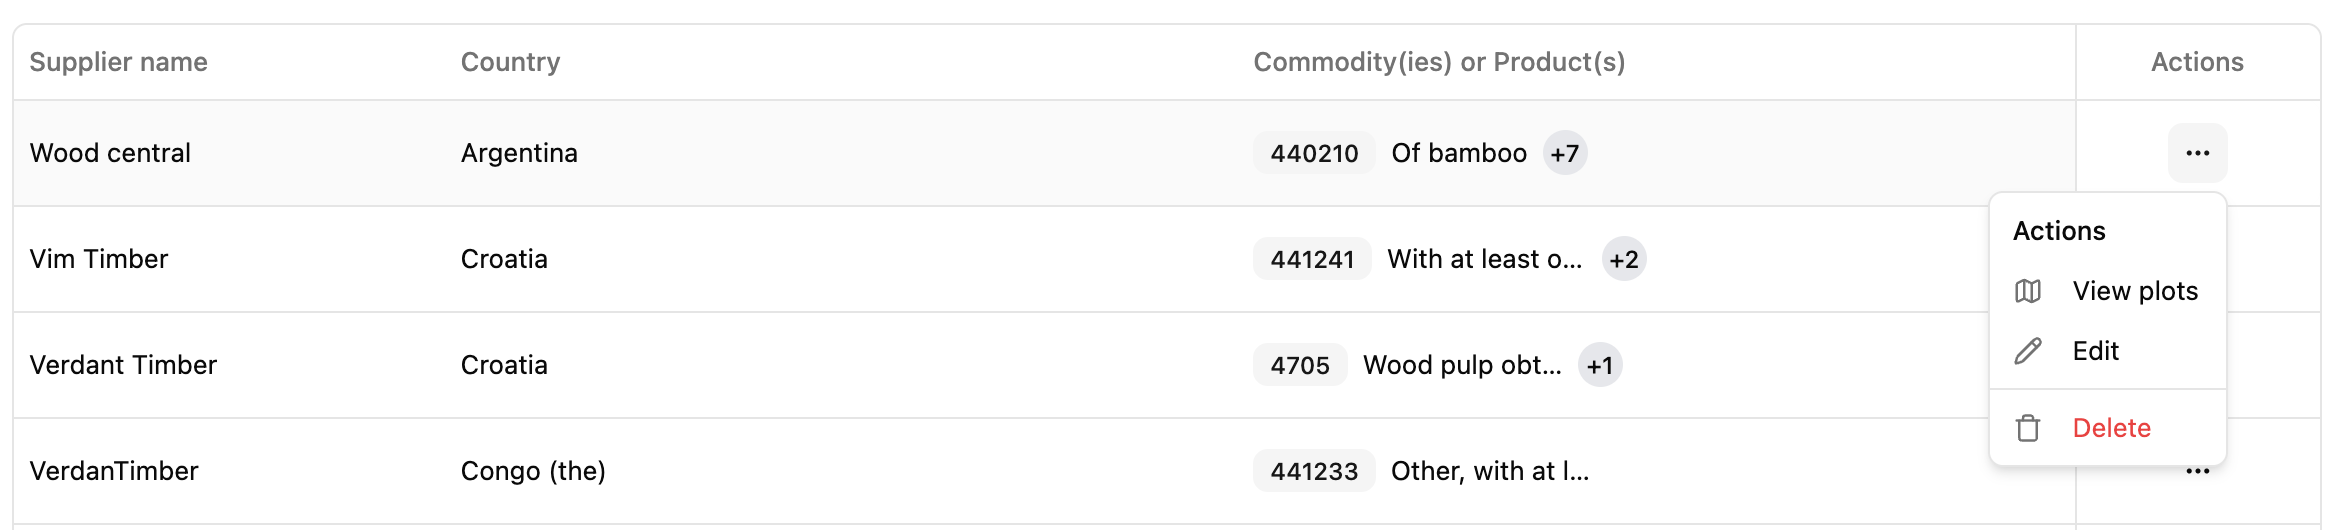
In the Suppliers section, locate the project you want to delete and find the “Delete” button. Click it and confirm the deletion.

Go to the Shipment section. Make sure to locate the “Delete” button, which allows you to remove the shipment. Once identified, click it and confirm the action to proceed.
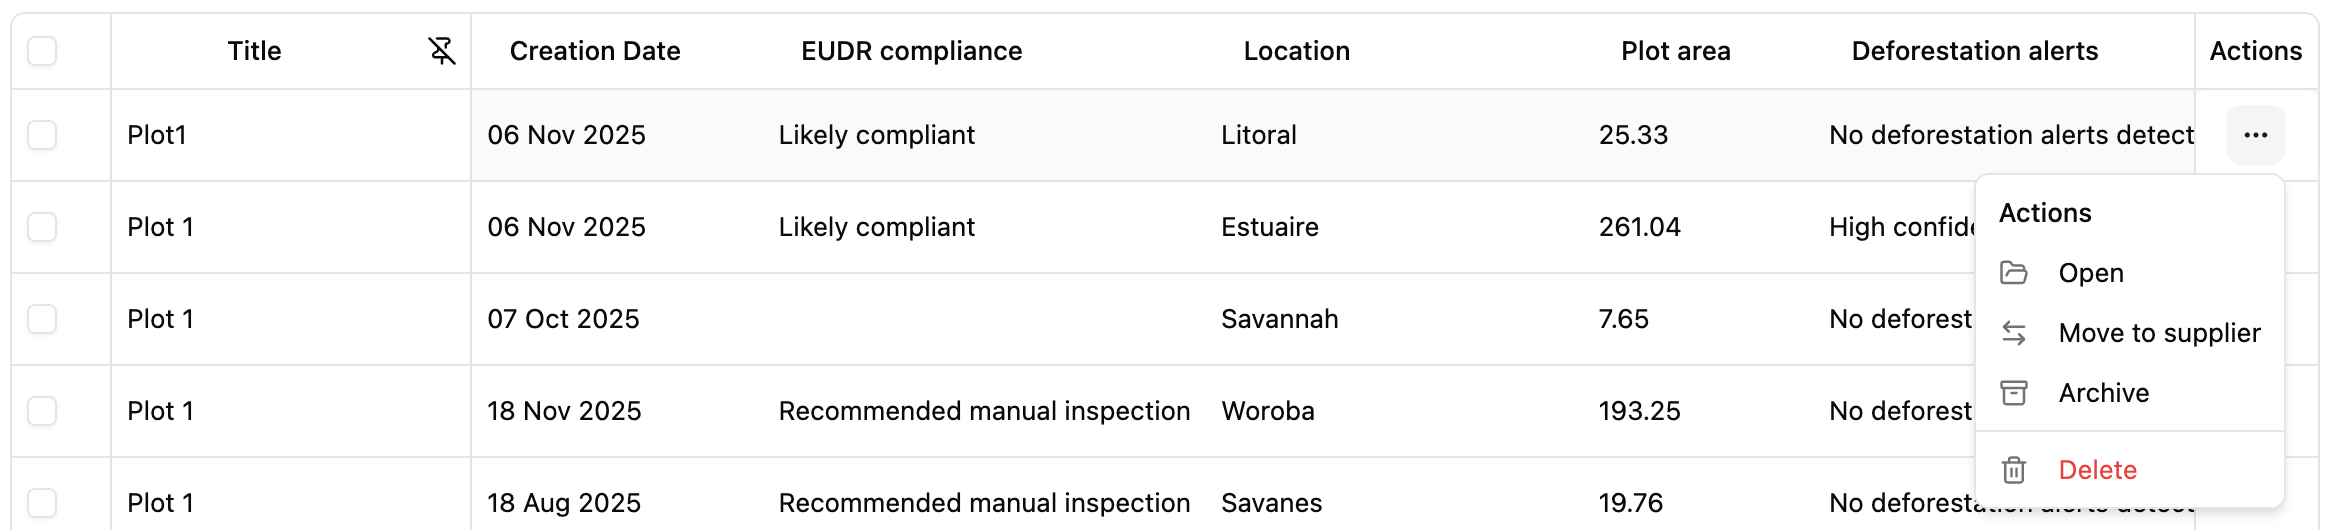
Inside the Plots section. Browse through the available options until you can locate the “Delete” button. This is the key action for removing the plot. Click it and confirm to complete the process.
Deleting a project on Orbify is a straightforward process that helps you maintain an organized and focused workspace. By following the steps outlined in this guide, you can easily remove outdated or unnecessary projects, ensuring that your Orbify dashboard remains tidy and conducive to productivity. Keeping your workspace clean and streamlined allows you to stay focused on current objectives and effectively manage your projects with ease.
